How to Install a Door Step by Step Door Installation Guide

A door is more than a panel that opens and closes. It controls security, weather resistance, privacy, and daily comfort. Yet even an expensive door can perform poorly when the frame is twisted or the threshold is uneven. This step-by-step door installation guide explains the process in practical terms, from measuring the rough opening to checking the final latch.

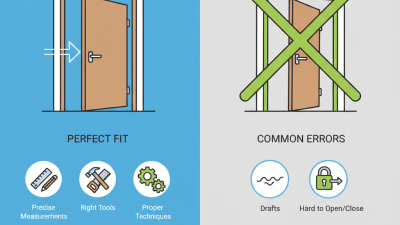
Industry evidence shows why careful installation matters. The U.S. Department of Energy’s Energy Saver guidance identifies air leakage around doors as a source of unwanted heat loss and drafts. Its recommendations emphasize proper weatherstripping, threshold adjustment, and sealing around the frame. The 2024 Cost vs. Value Report from Zonda also placed entry-door replacement among the strongest home improvement projects for return on investment. The result depends on workmanship, not only product selection.

A level is essential.

Small errors become visible quickly. A door that rubs at the top may indicate an uneven opening, loose hinges, or incorrect shimming. Experienced installers check the sill, plumb the jambs, and test the reveal before tightening every screw. Still, no guide replaces the manufacturer’s instructions or local building requirements. Door sizes, wall materials, flashing methods, and fire-rating rules can differ significantly. I have found that rushed measurements cause the most avoidable problems. This guide therefore highlights the details that are easy to overlook: supporting the threshold, sealing exposed gaps, protecting the wall cavity, and testing operation several times before finishing the trim.
How to Install a Door Step by Step Door Installation Guide

Assess the Doorway and Choose the Right Door

Before installing a door, measure the doorway, not just the old slab. Check the opening width at the top, middle, and bottom. Measure height from the finished floor to the header. Record the wall thickness, swing direction, and hinge side.

Look for uneven framing, moisture stains, cracked plaster, or soft subflooring. These defects can twist the frame and create stubborn gaps. The U.S. Department of Energy reports that space heating represented about 42% of residential energy use in its 2020 Residential Energy Consumption Survey. A poorly fitted exterior door can increase unwanted air movement and reduce comfort. Choose a door with suitable insulation, weather resistance, and an appropriate rough-opening size. Do not assume the replacement door matches the existing opening. That shortcut often causes trouble.

Tips: Use a long level and a steel tape. Check the threshold with a flashlight; daylight may reveal gaps. Leave the manufacturer’s recommended clearance around the frame. For exterior doors, compare U-factor and air-leakage ratings where available. The National Fenestration Rating Council uses these measures to support clearer product comparisons. Shim behind each hinge location, then test the swing before tightening every screw. A careful installer should still recheck the frame after fastening. Wood can move. My earlier assumption that a plumb wall guarantees a square doorway was wrong; older homes often prove otherwise.
Gather Tools, Materials, and Safety Equipment

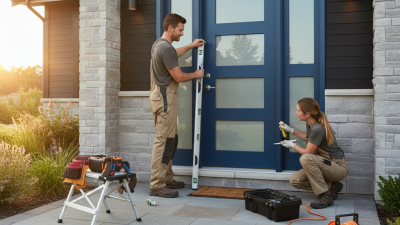
Before installing a door, place every tool within reach. You will need a tape measure, level, pencil, drill, screwdrivers, shims, a utility knife, and a hammer. Keep replacement screws, exterior-grade sealant, low-expansion foam, and packers nearby. Measure the rough opening at the top, middle, and bottom. Openings are rarely perfectly square.

Safety equipment deserves equal attention. Wear safety glasses, cut-resistant gloves, and sturdy footwear.

OSHA reports that about 2,000 workers suffer job-related eye injuries requiring medical treatment each day. A small metal fragment can cause permanent damage.

Use hearing protection when drilling masonry or metal. Keep the work area dry and remove loose packaging. Poor housekeeping creates avoidable trips.

Support the door on padded sawhorses before cutting or fitting hardware. A second person should help carry a heavy slab or frame. The U.S. Bureau of Labor Statistics continues to identify falls, slips, and trips as major sources of workplace injuries, so never balance tools on a ladder. Use a stable platform instead.

Check the manufacturer’s installation instructions and local building requirements before drilling. I have sometimes trusted an apparently level floor too quickly; rechecking with the level can expose a slight slope and prevent a door from rubbing. Allow sealant and foam to cure as specified, even when the frame looks secure.

Remove the Existing Door and Prepare the Opening

Removing an existing door starts with a careful inspection, not a crowbar. Before touching the hinges, check how the door swings and where it may bind. Measure the door slab, frame width, height, and wall thickness. Record every measurement twice. Keep the work area clear.

Wear eye protection and sturdy gloves. I usually support the door with a wedge before removing hinge pins or screws. A second person should hold the door while you lift it away. With the door removed, detach the hinges, latch hardware, trim, and fasteners. Cut painted joints with a sharp utility knife to reduce wall damage. Do not force the trim.

Mark each piece.

Inspect the rough opening for rot, loose framing, bent nails, or moisture stains. Remove damaged shims and scrape away old sealant. Use a pry bar carefully around the jamb, then pull stubborn nails from the rear when possible. Check the sill with a level and confirm the side studs are reasonably plumb. Small errors matter. If the opening is uneven, plane high spots or add solid shims rather than guessing. I once trusted an old level and installed a frame slightly out of square. The door worked, but the reveal looked uneven. Recheck with a reliable level, clear debris, and prepare a dry, stable opening before installation.

Remove the Existing Door and Prepare the Opening

This chart shows typical time requirements for the main preparation tasks in a door replacement project. Actual times vary according to door condition, fasteners, wall materials, and opening damage.

Estimated active work time: approximately 100 minutes. Allow additional time for curing, repairs, cleanup, and unexpected conditions.

Install the Door Frame and Set the Hinges

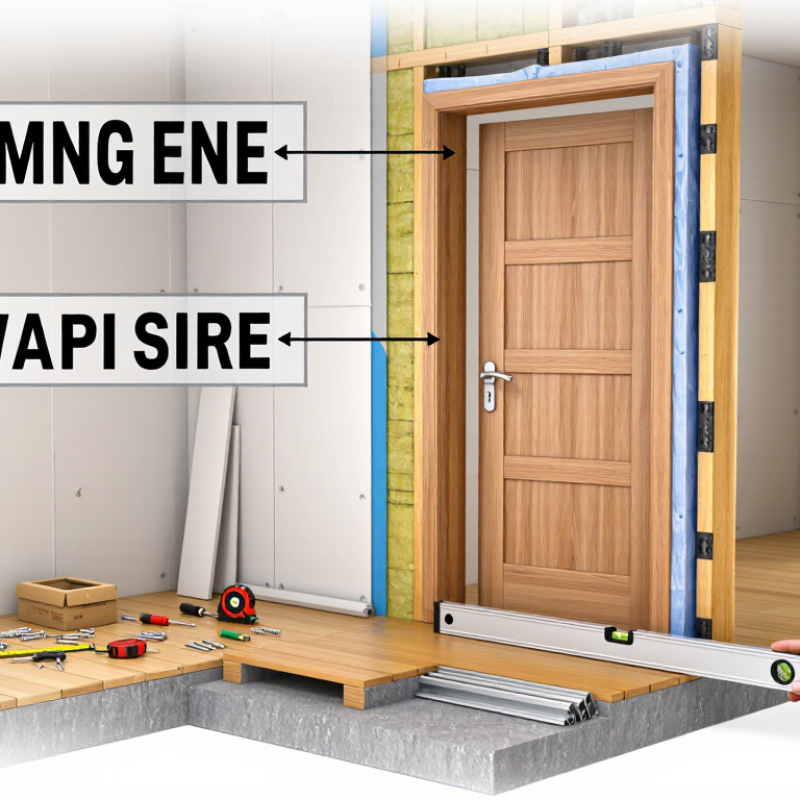
A door frame must sit square, plumb, and firmly supported. Measure the rough opening at the top, middle, and bottom. Walls are rarely perfectly straight. Leave a small, even clearance around the frame for adjustment. Cut shims from durable wood or composite material, not soft scraps that may compress later.

Set the hinge-side jamb first. Hold it against the opening, then check it with a level in two directions. Place shims behind each hinge location and near the top and bottom corners. Drive temporary screws through the jamb and shims, but do not tighten them fully yet. I once skipped the middle shim, and the jamb bowed slightly when the door was hung. That mistake made the latch alignment frustrating.

Mark the hinge positions on the door edge and jamb using the actual hinges. Keep each hinge leaf flush with the wood surface. A sharp chisel helps create clean recesses, though cutting too deeply weakens the connection. Secure the hinges with screws that reach solid framing without passing through the jamb. Hang the door and test its swing before fixing the latch-side jamb. It should open without scraping and remain still at several positions. Adjust the shims if needed. Small corrections now prevent larger repairs later. Check the reveal around the door again, because an even gap is more useful than a hurried installation.

Hang, Align, Secure, and Test the New Door

Set the door in the opening with the hinges facing the correct side. Support its weight with shims or a temporary wedge. I usually install the top hinge first, then the middle and bottom hinges. Leave the screws slightly loose until the door hangs naturally. Check the gap around the frame. It should look even, usually about 3 millimeters. A small difference can cause rubbing later.

Close the door gently and place a level against its edge. Adjust the hinge screws or add thin shims behind the hinge side. Do not force the frame into position. I once rushed this step, and the door looked straight but scraped the floor after several days. That mistake taught me to test movement repeatedly. Check that the door swings freely and stops without drifting open. The reveal should remain consistent from top to bottom.

Secure the frame after alignment. Drive long fixing screws through the shims, but avoid overtightening them. Excess pressure can bend the frame and narrow the opening. Mark the latch position on the strike plate, then adjust it until the latch enters cleanly. Test the handle, lock, and closing force several times. Listen for clicks, rubbing, or loose movement. If the door needs a hard push, realign it before adding more force. Finish by tightening every hinge screw and opening the door again. Small corrections now prevent costly repairs later.

Questions? Give Us A Call!