7 Exterior Door Installation Tips for Global Buyers?

For global buyers, an exterior door is more than a decorative entrance. It must withstand weather, transport conditions, and repeated daily use. Yet installation advice often ignores regional differences. Rain, coastal salt, snow, heat, and uneven masonry can change the result. This guide explains how careful exterior door installation protects comfort, security, and product performance. It focuses on practical decisions that buyers, contractors, and installers can verify.

Accurate opening measurements matter. A few millimeters can affect alignment, sealing, and smooth operation. Experienced installers check the wall condition before lifting the door into place. They inspect the sill, frame, threshold, and surrounding structure for moisture damage or movement. Flashing, sill pans, suitable sealants, and correctly spaced fasteners help manage water. In coastal or monsoon regions, corrosion-resistant hardware deserves special attention. The local climate is not a minor detail. Small details matter.

Reliable guidance should come from manufacturer instructions, qualified installation experience, and applicable regional standards. Product specifications may differ between markets, even when doors look identical. Global buyers should confirm rough-opening sizes, handing, insulation values, hardware compatibility, and warranty conditions before purchase. They should also ask who will install and service the door locally. Even experienced teams miss details. That is worth acknowledging. A rushed installation can weaken an otherwise excellent product. By examining seven practical tips, buyers can reduce avoidable errors and make better decisions across different climates, construction methods, and supply chains. The goal is not perfection, but a durable, properly fitted entrance that performs as promised.
7 Exterior Door Installation Tips for Global Buyers?

Understand Regional Codes, Climate Needs, and Door Performance Standards

Exterior Door Installation Tips for Global Buyers

Local rules should guide every exterior door purchase. Check the required opening size, fire rating, safety glass, and emergency exit rules. Permit requirements also vary by region. Ask a qualified local installer to verify them before ordering. A small code mistake can cause expensive delays.

Climate changes the door’s performance. In humid areas, choose moisture-resistant cores and sealed edges. Coastal projects need corrosion-resistant hardware and careful drainage. Cold regions benefit from insulated panels, thermal breaks, and compression weatherstripping. Hot climates may require reflective glazing and protection from direct sunlight. Strong wind zones need tested structural ratings, secure anchors, and reinforced frames. Measure the wall opening after removing trim, not from an old drawing.

Performance documents deserve close attention. Review tested air leakage, water penetration, wind pressure, thermal transmittance, and acoustic data. Standards differ between countries, so compare test methods carefully. The highest advertised rating may not suit your climate. Installation matters just as much. Keep the frame plumb, level, and square. Use compatible flashing and low-expansion foam. Seal the sill without blocking drainage paths. Adjust hinges and locks after the frame settles.

Details matter.

One common mistake is trusting the door alone. I have seen excellent products underperform because the threshold was poorly supported. Inspect the swing, latch, seals, and daylight around the frame. Keep photographs, test reports, and installation records. Recheck the door after heavy rain or temperature changes. Some assumptions will be wrong. That is why local review remains essential.


Measure the Opening and Select a Compatible Exterior Door System

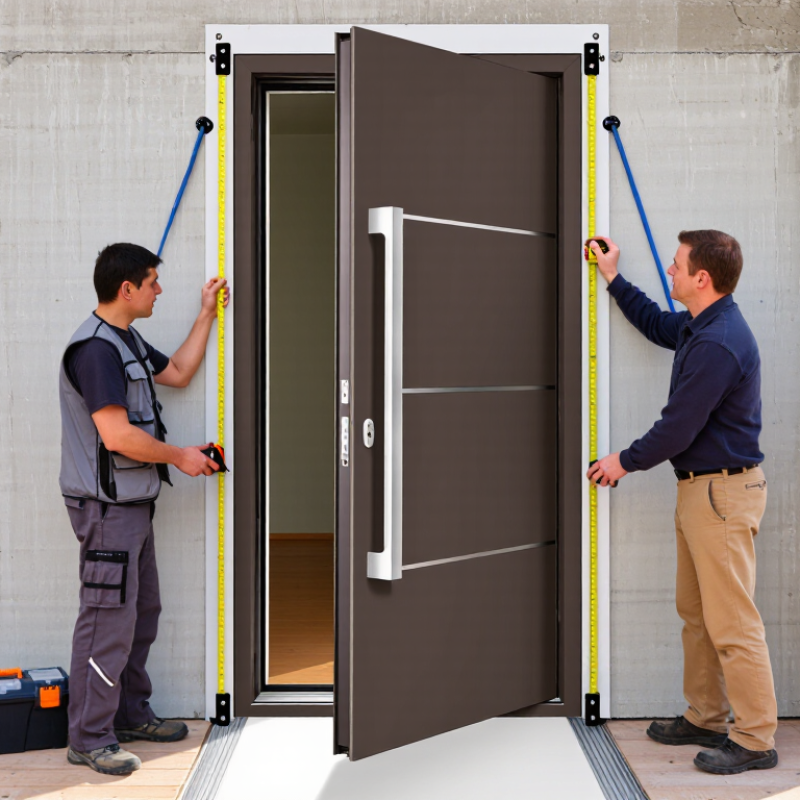
Measuring the opening is the most important step in exterior door installation. Do not measure only the existing door slab. Remove interior trim and inspect the rough opening, sill, framing, and surrounding wall. Record the width at the top, middle, and bottom. Measure height on both sides and in the center. Use the smallest dimensions when checking fit.

Leave a controlled installation gap for shimming and adjustment. The exact allowance depends on the door system and local construction practice. Check whether the opening is square by comparing diagonal measurements. A difference of several millimeters can affect locking and weather sealing. Also confirm wall thickness, threshold height, hinge position, and door swing. Small details matter.

Compatibility goes beyond size. Consider the region’s rain, wind, heat, cold, and humidity. A door exposed to heavy rain may need a raised, drained threshold and reliable flashing. In colder areas, examine insulation values and thermal breaks. Coastal projects may require corrosion-resistant hardware. Confirm that the system meets applicable building and safety requirements before ordering.

I once trusted an old measurement and had to correct the frame later. That mistake was avoidable. Recheck every number, preferably with a second person. Product drawings can also reveal hidden requirements, such as minimum support or drainage space. A visually attractive door is still unsuitable if it cannot fit, seal, drain, and operate smoothly in its destination.

Prepare the Frame, Threshold, Hardware, and Installation Materials

A durable exterior door begins with a prepared frame, not the door slab. Check the rough opening for square, plumb, and adequate clearance. Measure twice. Small errors matter. Remove dust, damaged wood, and loose fasteners before installation. Use treated or moisture-resistant materials where the frame may contact water. Climate also matters; coastal air, heavy rain, and freezing temperatures can change material choices.

Set the threshold on a firm, level base with a continuous waterproofing layer beneath it. Add a sill pan or approved drainage system when exposure is high. Keep the threshold slightly sloped outward, if the design allows. Shim the jambs behind every hinge and locking point. Do not over-tighten screws, because warped jambs can make the door drag. I once corrected a door that looked level but leaked below the threshold. The real problem was an uneven subfloor. Keep it level. Install weatherstripping carefully, then test the latch, hinges, handle, and lock before final sealing. Prepare compatible screws, shims, sealant, flashing tape, a drill, a level, and a sharp utility knife. Follow the door maker’s instructions and local building requirements, since installation details can vary by region. A final hose test can reveal gaps that visual inspection misses.

7 Exterior Door Installation Tips for Global Buyers

Prepare the frame, threshold, hardware, and installation materials before fitting the door.

The chart shows typical reference quantities for one standard single-leaf exterior door installation: one frame, one threshold, three hinges, one lockset, approximately eight shims, one roll of weatherstripping, and two cartridges of exterior-grade sealant. Actual quantities may vary with door size, wall construction, climate, and local building requirements.

Install, Align, Seal, and Insulate the Door Step by Step

Exterior Door Installation Tips for Global Buyers

Measure the rough opening in millimetres, checking width at three points. Compare these measurements with the door frame and threshold. Confirm the swing direction, wall thickness, and local building requirements before unpacking. A dry fit reveals problems early. Leave a small, even clearance around the frame, but follow the supplied installation tolerance.

Set the threshold on a firm, level surface. Use moisture-resistant packers where needed. Secure the hinge side first, then check the frame with a spirit level. Add fixings gradually, alternating between sides. Over-tightening can twist the frame. It happens more often than expected. Close the door several times and inspect the gap around the panel. The reveal should look consistent from top to bottom.

Apply compatible sealant beneath the threshold and around the exterior frame. Fill the internal gap with low-expansion insulation material, avoiding pressure that could bow the frame. Install backer material before exterior sealant when the joint is deep. Seal corners carefully, especially on windward walls. Test the latch, weather seal, and drainage path after installation. A thin line of daylight signals a problem. Recheck everything after temperature changes, because materials can move slightly across climates.

Inspect Security, Weather Resistance, Operation, and Long-Term Maintenance

7 Exterior Door Installation Tips for Global Buyers

A secure exterior door begins with accurate opening measurements, not attractive photographs. Check the frame, hinges, lock points, and threshold before installation. The door should close firmly without forcing the handle. A small gap can weaken security and increase drafts.

Tip 1: Test the lock from inside and outside. Confirm smooth operation with gloves, keys, and repeated cycles.

Weather resistance depends on the local climate. Inspect seals around the frame, sill, and glazing, if included. Look for continuous compression, clean drainage paths, and materials suited to rain, heat, frost, or coastal air. Water should move away from the wall, not collect beneath the threshold.

Tip 2: Spray water gently around the frame after installation. Do not assume one successful test proves long-term protection. I have seen poorly adjusted thresholds cause leaks after several storms.

Operation and maintenance affect service life. Leave clearance for seasonal movement, especially with timber or mixed-material doors. Check screws, hinges, seals, and drainage channels every few months. Clean salt, dust, and grit before they damage moving parts. Lubricate only with a product suitable for the hardware.

Tip 3: Record the installation date and inspection results. This simple habit exposes recurring problems early, although it is easy to neglect. Manufacturers’ instructions and local building requirements should guide final adjustments.
Questions? Give Us A Call!